

Friday, July 27, 2012
Wall Art
Our bedroom walls need a little art. So does the living room. I've been looking online (especially Etsy) for ideas and inspiration. I tried my hand at watercolor painting in an attempt to DIY our art, but in the end decided that I probably need a lot more practice before creating a wall-worthy piece. There is a WPA print of Denali National Park that Daniel and I both like. At $40, it's a little more than I wanted to spend. After continued searching, I discovered an over-sized calendar containing this and 11 other prints for less than $20! I've pre-ordered the 2013 calendar and can hardly wait for it to come. Each print is 13x 19 inches. Three of them should look OK over the fireplace. Despite being reproductions of vintage prints, I am hoping that the bright colors and retro look will give our living room a younger, fresher vibe. We would like each one to have some kind of personal significance, so we'll probably hang the Blue Ridge Parkway picture with Denali.
Monday, July 23, 2012
Boat Beds II
Daniel got home around lunch time today, giving us an early start to the weekend and more time to work on the bunk beds! He managed a lunch break yesterday to pick up the cherry from the lumberyard. He has been figuring out how to make the trim this afternoon. It seemed kind of complicated, so while he did that, I cut lots of plugs to fill the screw holes on the posts.I drilled way more than we needed, just so they will be readily available for future projects, and cause it was kinda fun.

That's really everything new. With running on Monday night, soccer on Wednesday, and Happy Hour on Thursday night this is the first opportunity we've had to spend some time in the tool room.
 |
| Here's a look at the posts. I sanded them today and will put another coat of varnish on tonight, once we are done sawing. |
 |
| I like using the drill press best out of all the tools. It is quiet and doesn't seem life-threatening in any way. |

 |
| Trim pieces |
Tuesday, July 17, 2012
Boat Bunk Beds
The summer is whizzing by. Our most recent project has been getting Mari's room ready for the new baby. We are completely changing it from pink and green to a nautical theme (they will be sharing, but I think this theme will work well for girls too, despite the reds and blues). This includes getting a new bed for Mari, since the baby will need the crib. Originally, we both loved the idea of bunk beds, but once I taped it out on the floor, we realized the room was too small for twin sized bunk beds. We would have to get rid of the dresser, the changing table or the rocker in order to fit a twin bed. I was OK with ousting the rocker, but Daniel was adamant that it stayed since he will probably be the one who uses it when the baby wakes up crying at night.
Our creative solution was to build toddler sized bunk beds. Since Mari has always been on the short side, we figure she will be able to sleep in this size bed until she is 5-6 years old. At that point, we will probably have moved to a bigger house and she could have her own room, twin sized bed included.
I couldn't find a picture of Mari's room, but here is a video that shows what it looked like, minus toys scattered everywhere.
So, we wanted the bottom bed to be shaped kinda like a boat, with a rounded front. The top bunk will just be square. It truly has been a joint collaboration. We both designed it, figuring out the dimensions and cutting all the wood together. Daniel mainly figured out how to make the front part rounded and sturdy, and I stained everything that will not be painted. Here are some of the in progress pics from last weekend.
Since then, we have been working on the posts, which are made from two 2x4's screwed together. This saved us about $20 from having to buy 4x4 posts, . I was a little skeptical about how this would look, but after much sawing, sanding and staining, they look great! Daniel sawed off the corners to make them look rounder and more mast-like.
Left to do includes: assembling the top bunk, cutting and attaching the trim, mounting the bunks to the posts
We are kinda stuck until the weekend, because we need to go to the lumberyard, which is only open when Daniel is at work, to get more cherry trim pieces and buy a new router bit.
All told, these beds will have cost about $100 in materials, since we already have the paint, stain, and varnish we'll be using, as well as sandpaper. Using pine reduced the cost a lot (although the trim will be cherry cause we already have a little of that). Not bad for solid wood bunk beds, even if they are toddler sized. That doesn't include the mattresses. I've been researching those on amazon, trying to find the best, thickest one with the highest weight limit and best reviews. It's almost as time consuming as building the beds!
I can't wait to post after pics! We hope to have the bed completely finished by this weekend. Maybe once that is done, I can really finish Mari's play kitchen.
Our creative solution was to build toddler sized bunk beds. Since Mari has always been on the short side, we figure she will be able to sleep in this size bed until she is 5-6 years old. At that point, we will probably have moved to a bigger house and she could have her own room, twin sized bed included.
I couldn't find a picture of Mari's room, but here is a video that shows what it looked like, minus toys scattered everywhere.
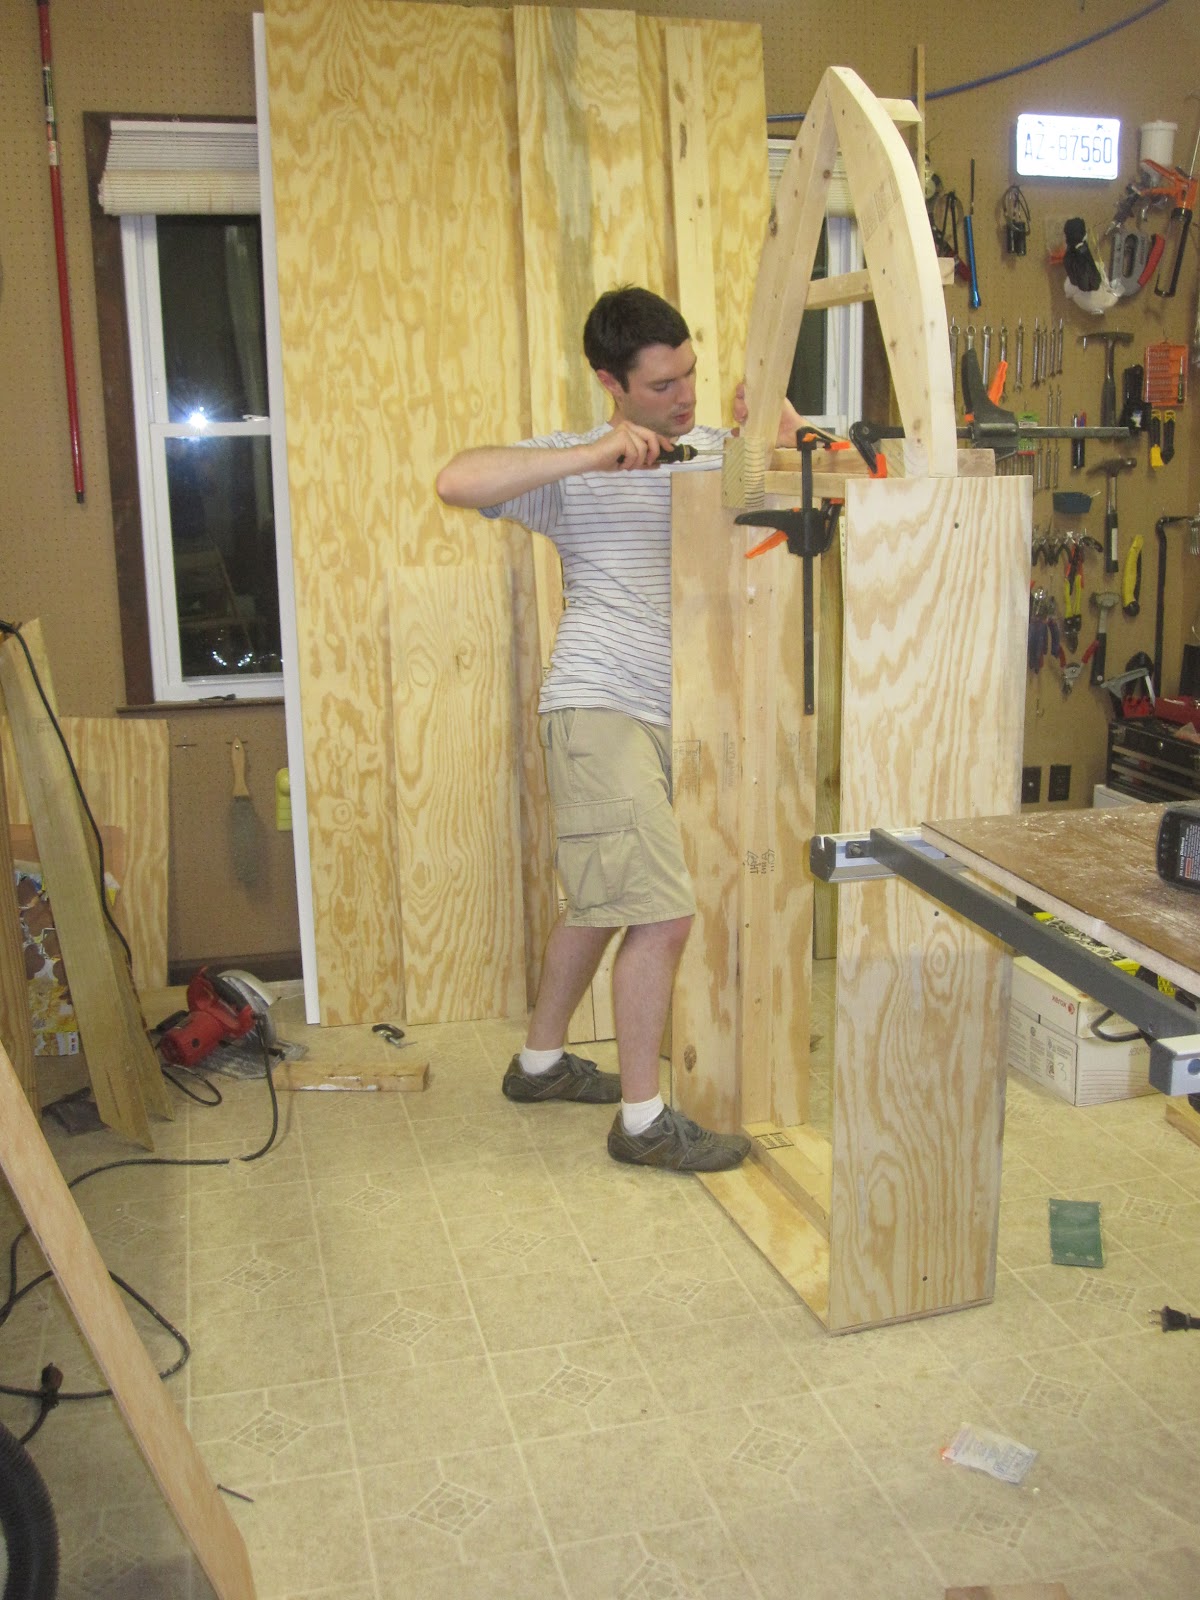 |
| Daniel working hard |
 |
| The bottom frame |
 |
| Success with the jigsaw |
 |
| Mari likes it already! |
 |
| It's starting to look more like a boat |
Left to do includes: assembling the top bunk, cutting and attaching the trim, mounting the bunks to the posts
We are kinda stuck until the weekend, because we need to go to the lumberyard, which is only open when Daniel is at work, to get more cherry trim pieces and buy a new router bit.
All told, these beds will have cost about $100 in materials, since we already have the paint, stain, and varnish we'll be using, as well as sandpaper. Using pine reduced the cost a lot (although the trim will be cherry cause we already have a little of that). Not bad for solid wood bunk beds, even if they are toddler sized. That doesn't include the mattresses. I've been researching those on amazon, trying to find the best, thickest one with the highest weight limit and best reviews. It's almost as time consuming as building the beds!
I can't wait to post after pics! We hope to have the bed completely finished by this weekend. Maybe once that is done, I can really finish Mari's play kitchen.
Thursday, June 21, 2012
New Look
Saturday afternoon I took a couple hours to wander around my favorite thrift stores while Daniel stayed home with Mari. One of those stores is right next to the Habitat store, so I took a look in there as well. Happily, they had marked down all light fixtures from $25 to $5-15! So, I spontaneously bought a new ceiling light. Daniel put it up as soon as I got home. It's much brighter than the old one, which was better suited to a kids room (notice the moon and stars on it). Every time I go in the kitchen, turning on the light makes me so happy.
This new light prompted a serious urge to redo our kitchen and some even more serious craigslist searches for stainless appliances. We've always wanted stainless appliances, but didn't want to spend the money, since we don't plan to live here forever. So, used seemed the best option. After a couple days of searching, we looked at this kitchenaid superba model someone was selling. It's about 10 years old, but in good working condition. I like how the brushed finish doesn't show finger prints very well, even after smearing my hands all over it.
So, now we have two refrigerators; one for the kitchen and one for the living room. =-) Unless Daniel decides he wants it in the shed, we will probably list the white one on craigslist or donate it to habitat. It's in our living room right now, the most out of the way spot in the house.
We also found a stainless dishwasher on craigslist that is sitting the the tool-room. It needs a new hinge. I'm sad about loosing our chalkboard dishwasher, but the soap dispenser broke and a new one would be so much more functional (as soon as we fix the hinge).
Getting the dishwasher home was easy, since the two of use could easily lift and place it in the back of the Matrix. The refrigerator took some work. I rented a pickup truck and appliance dolly from U-haul and Daniel and the seller managed to get it into the truck, keeping it upright the whole time. Our friendly neighbor helped unload it into the kitchen. Daniel made some ramps out of scrap wood that were essential in the transport. The whole process of getting the U-haul, picking up Daniel, buying and unloading the refrigerator, cleaning and setting it up, and returning the u-haul took about eight hours. At least 4 of those Daniel and I spent cleaning the new appliance.
One thing that is kind of a pain is that we have no place to hang a dishtowel. We used to put one through the door handle. Another small downside is I have to keep my kitchen timer on the side instead of the front, since magnets won't stick to the stainless. It was worth it though. Not only do we have a newer, more aesthetically pleasing refrigerator, but now I know how to rent from U-haul and that Daniel really does have muscles of steel.
On a side note, the weather has been super hot down here lately. Here is a look at how Mari stays cool.


 |
| Taking down the old light (with old refrigerator) |
This new light prompted a serious urge to redo our kitchen and some even more serious craigslist searches for stainless appliances. We've always wanted stainless appliances, but didn't want to spend the money, since we don't plan to live here forever. So, used seemed the best option. After a couple days of searching, we looked at this kitchenaid superba model someone was selling. It's about 10 years old, but in good working condition. I like how the brushed finish doesn't show finger prints very well, even after smearing my hands all over it.
 |
| New light and refrigerator |
So, now we have two refrigerators; one for the kitchen and one for the living room. =-) Unless Daniel decides he wants it in the shed, we will probably list the white one on craigslist or donate it to habitat. It's in our living room right now, the most out of the way spot in the house.
We also found a stainless dishwasher on craigslist that is sitting the the tool-room. It needs a new hinge. I'm sad about loosing our chalkboard dishwasher, but the soap dispenser broke and a new one would be so much more functional (as soon as we fix the hinge).
Getting the dishwasher home was easy, since the two of use could easily lift and place it in the back of the Matrix. The refrigerator took some work. I rented a pickup truck and appliance dolly from U-haul and Daniel and the seller managed to get it into the truck, keeping it upright the whole time. Our friendly neighbor helped unload it into the kitchen. Daniel made some ramps out of scrap wood that were essential in the transport. The whole process of getting the U-haul, picking up Daniel, buying and unloading the refrigerator, cleaning and setting it up, and returning the u-haul took about eight hours. At least 4 of those Daniel and I spent cleaning the new appliance.
 |
| Close up view |
One thing that is kind of a pain is that we have no place to hang a dishtowel. We used to put one through the door handle. Another small downside is I have to keep my kitchen timer on the side instead of the front, since magnets won't stick to the stainless. It was worth it though. Not only do we have a newer, more aesthetically pleasing refrigerator, but now I know how to rent from U-haul and that Daniel really does have muscles of steel.
On a side note, the weather has been super hot down here lately. Here is a look at how Mari stays cool.


Tuesday, May 1, 2012
Ice Cream & Donuts
This weekend we made homemade ice cream and donuts. Those were the most exciting events of the weekend. All the rest of our time was taken up with lounging around and general maintenance stuff like spraying for bugs, trimming our monstrous hedges and working on Mari's toy kitchen (I am waiting until completion for the big reveal).
Back to the food, on Saturday evening, we tried a recipe for Vanilla Bean Ice Cream from The Sweet Kitchen cookbook. Using the basic ingredients of egg yolks, 1/2 and 1/2, sugar, heavy cream, and vanilla beans, this was our first attempt at making a custard based ice cream. Usually, we are too impatient to cook and cool it. Our first attempt at this recipe was a total failure. I whisked the egg yolks too much as Daniel poured in the hot cream, morphing them into a frothy mess. Then, as this was supposed to be thickening into custard over medium heat, I accidentally boiled it, turning everything from silky smooth creaminess into congealed egg. Very disappointed, we threw it out, drove to the store for more 1/2 and 1/2 and tried again. The upside of a second try is that now I have 12 egg whites in the fridge, enough for angel food cake! Attempt # 2 = pure bliss. Everything worked like it was supposed to (despite watching an old episode of Home Improvement while we cooked) and after rapidly cooling the custard in a bowl of ice water, we ice-cream-machined it into perfection.
P.S. We ate some more this evening and even after 24 hours in the freezer, it was very, very good. We will definitely be trying this recipe again, except next time maybe cinnamon or coffee flavored.
On to the donuts. I attribute the urge to make these to baby #2. I REALLY craved homemade donuts. Not the store bought kind from Dunkin Donuts or Kroger (although I never turn those down), but the homemade kind, coated with butter & sugar. Not having time before church, we made and ate these for lunch. I used the Pioneer Woman's Homemade Donut Recipe, and they tasted fabulous. The only thing I did differently was let the dough rise for 1 hour in a warm over instead of overnight in the refrigerator. Daniel went to the market while the dough was rising to buy a candy thermometer so we could heat the oil to just the right temperature. Cooking for less than a minute per side, frying was speedy.

Both of us love donuts rolled in granulated sugar, but the confectioner's sugar glaze came out really great too. Ahhhh, these hit the spot.
Saturday, April 28, 2012
Best Lemon Cake
I made this cake last night and it's soooo good. It was so good that I let Mari try some, breaking our no sweets until she knows what she's missing rule. So much easier than making lemon bars from scratch, it really hits the spot if your in a lemon kind of mood. I was in a fruit kind of mood, but we had no fruit except strawberries... Kind of a cross between pudding and cake, it's wonderful with whipped cream or strawberries.
Lemon Syrup
Combine and let sugar dissolve:
1/4 cup lemon juice
1/4 cup sugar
Lemon Cake
3/4 cup butter, at room temperature
1 cup sugar
1 1/2 teaspoons grated lemon peel
2 large eggs
3/4 cup all-purpose flour
1 tea. baking powder
1/4 teaspoon salt
Preheat oven to 350 degrees.
Butter an 8-inch square metal baking pan.
Cream butter, sugar and lemon peel until fluffy. Add eggs, then dry ingredients.
Pour the batter into pan and bake about 25 minutes.
Placing the pan on a rack, poke holes in the top of the cake and spoon over the lemon syrup, allowing it to soak in. Cool completely (we ate some before it was all the way cooled, and I prefer it slightly warm).
Adapted from Aunt Dimity and the Deep Blue Sea by Nancy Atherton.
Friday, March 9, 2012
Spring Cleaning
I have been cleaning a lot lately. My spree started last week when Mari pulled our bedroom curtains down (rods attached). In her defense, they were not affixed to the wall very well. I bought and assembled the curtain rods and hung the curtains without Daniel's knowledge (as a surprise), so I didn't use anchors or look for studs... Daniel rehung the curtain rods a few days ago. "Why in the world didn't I hang these in the first place," he yelled when he saw the couple dozen screw holes in the wall. In my defense, I don't remember making all those mistakes, so some of those holes were probably already there. I'm glad the rods are firmly attached now. =-) If it wouldn't encourage bad behavior, I'd have Mari try swinging on our newly hung curtains. Daniel's work inspires that much confidence.
Since the curtains were already down, I washed and ironed them. That was a big chore, not having a big ironing board. I'm not complaining, since we hardly ever need a big ironing board. It was just a little tricky to maneuver on our mini one. Piled on the floor, our curtains picked up some dust, so that motivated me to wash all the floors and vacuum the rugs. Then I washed our bedding and our pillows. I LOVE how our bedroom feels when it's perfectly clean and tidy. Every evening after Mari goes to sleep we've been relaxing in there, reading side by side on the bed and drinking mugs of hot tea. It's so nice to have a clean bedroom.
Another reason I love this room is it's brightness. During the day, I can leave the shades pulled halfway down and lots of light still streams in. After living in an apartment with only three windows (north facing), I really appreciate sunlit rooms. Upgrading from a three window apartment to a 20 window house meant we needed lots of window treatments, but that's another post.
Since the curtains were already down, I washed and ironed them. That was a big chore, not having a big ironing board. I'm not complaining, since we hardly ever need a big ironing board. It was just a little tricky to maneuver on our mini one. Piled on the floor, our curtains picked up some dust, so that motivated me to wash all the floors and vacuum the rugs. Then I washed our bedding and our pillows. I LOVE how our bedroom feels when it's perfectly clean and tidy. Every evening after Mari goes to sleep we've been relaxing in there, reading side by side on the bed and drinking mugs of hot tea. It's so nice to have a clean bedroom.
 |
| Add caption |
Subscribe to:
Posts (Atom)