I made good cookies yesterday and thought you (especially Mom) might want the recipe. It's a Mrs. Fields recipe from an old book that I have.Very easy and a little different from the ordinary standbys that we usually make (chocolate chip, sugar, peanut butter, molasses, chocolate crinkle, and snicker doodles).
Makes about 2 1/2 dozen
2 cups flour
1/2 teaspoon baking powder
1/4 teaspoon salt
1/2 cup (packed) light brown sugar (I used dark brown cause it's all we had)
1/2 cup granulated sugar
1 stick softened butter
1 large egg
4 ounces sour cream (1/2 cup)
1 teaspoon vanilla
6 ounces (1 cup) chocolate chips
Preheat oven to 300F.
Combine first three dry ingrediants and set aside.
Cream sugars and butter. Add egg, sour cream and vanilla and beat at medium speed until light and fluffy.
Add flour. Do not over mix.
Melt chips in the microwave. Pour over cookie batter. Using a spatula or wooden spoon, lightly fold in the melted chocolate to create a swirled, marbleized pattern.
Drop by rounded tablespoons, 2 inches apart on ungreased cookie sheets.
Bake for 20 minutes. Do not brown.
I think they are best right out of the oven. Otherwise, we like to heat them up in the microwave for a few seconds. These cookies are very good for my health right now, because they cause me to drink lots of milk, and the baby needs calcium. =-)

Friday, August 17, 2012

Monday, August 13, 2012
Girl blankets for a boy
This weekend I tried dying clothes at home! I read online somewhere about how easy dying clothing in the washing machine is, so that was my original plan. Once I read the RIT dye package, I decided the stovetop method would probably work better, because even though our HE washer has a hot setting, I was unsure about putting salt in my machine.
Overall, I just followed the directions on the package of navy blue dye, pre-dissolving the dye in 2 cups of hot water and adding a cup of salt (I used canning salt and the kitchen smelled like canning pickles), simmering the clothes for 30 minutes in 2 gallons of water while stirring constantly, and then rinsing the clothes in warm water until the water ran clear. Rinsing took just as long as simmering. Once that was finished, I stuck them in the washing machine for 2 cycles. The bathtub sustained some color damage, but nothing a little bleach couldn't handle. On the plus side, our bathtub has never been so clean!
I dyed a bright red maternity sweater and 2 pink "Swaddle me" blankets from the salvation army. The sweater, I only wore a couple times because I don't look very good in red. Hopefully, the weather will get chilly enough by the end of October for me to break out the winter maternity clothes, now that this sweater is a more appealing color. The pink blankets, I picked up recently, being too good a deal to pass up at 99 cents apiece. Unlike Daniel, I am hopeless at swaddling with a real blanket, so these are awesome.
Unfortunately, I didn't take any before pictures, but I am so happy with how the blankets turned out! The white and dark polka dots showed through on one blanket, but that's OK. I might sew some yellow stars on the plain blanket if I get bored this week.
The navy blue dye turned my bright red sweater into a nice maroon color. It's a very soft sweater, so I am hoping for a chance to wear it! After so many months, most of my summer maternity clothes have lost their appeal.
This was a fun project. Not as fun as tie dying was as a kid, but almost. I would be up for doing it again.
By the way, the dye was half the price at Michael's than it was at Joann's, and that is without coupons.
 |
| Getting ready |
Overall, I just followed the directions on the package of navy blue dye, pre-dissolving the dye in 2 cups of hot water and adding a cup of salt (I used canning salt and the kitchen smelled like canning pickles), simmering the clothes for 30 minutes in 2 gallons of water while stirring constantly, and then rinsing the clothes in warm water until the water ran clear. Rinsing took just as long as simmering. Once that was finished, I stuck them in the washing machine for 2 cycles. The bathtub sustained some color damage, but nothing a little bleach couldn't handle. On the plus side, our bathtub has never been so clean!
I dyed a bright red maternity sweater and 2 pink "Swaddle me" blankets from the salvation army. The sweater, I only wore a couple times because I don't look very good in red. Hopefully, the weather will get chilly enough by the end of October for me to break out the winter maternity clothes, now that this sweater is a more appealing color. The pink blankets, I picked up recently, being too good a deal to pass up at 99 cents apiece. Unlike Daniel, I am hopeless at swaddling with a real blanket, so these are awesome.
 |
| After |
Unfortunately, I didn't take any before pictures, but I am so happy with how the blankets turned out! The white and dark polka dots showed through on one blanket, but that's OK. I might sew some yellow stars on the plain blanket if I get bored this week.
The navy blue dye turned my bright red sweater into a nice maroon color. It's a very soft sweater, so I am hoping for a chance to wear it! After so many months, most of my summer maternity clothes have lost their appeal.
 |
| After |
This was a fun project. Not as fun as tie dying was as a kid, but almost. I would be up for doing it again.
By the way, the dye was half the price at Michael's than it was at Joann's, and that is without coupons.
Thursday, August 9, 2012
Kitchen table and chairs
We bought a kitchen table and 4 chairs off craigslist a couple weeks ago. Our chairs are upholstered in cream colored fabric and are not holding up to Mari very well. I wouldn't mind the white, and would actually prefer it, if we could easily wash the covers. Our slip-covered white armchair has turned out to be fantastic and still looks as good as new after I wash it with a little bleach. Alas, the kitchen chair cushions are attached with dozens of staples. I'm ready for some easily-wipable wooden chairs now.
I tried really hard not to get excited about this table and chairs when I saw them online. The guy was only asking $50 and the solid wood table is really pretty. After some e-mailing we arranged to pick up the set later that day. Turns out, a dog has chewed many of the chair legs and they are uncomfortable, at least when compared to our plush, cushy, rolling chairs, but when the guy lowered the price to $30, I couldn't say no. We figured they would need to be refinished anyway because of the color, and most of the chew marks are superficial.

Our current table is very functional and we've been extremely happy with it. It's some kind of laminated particle board - virtually indestructible. The only downside to this table is that it doesn't look very nice without a tablecloth on it. Still, we want to keep it for a craft/school table. Someday, if we have a dining room and eat in kitchen, two tables with be handy. In the meantime, two tables and eight chairs won't fit in our dining room, so Daniel took the legs off the new one and is storing it in the shed until I can start working on it.
One week later:
I started refinishing our kitchen table! I had been waiting for the perfect, cool evening to do it. Daytime weather is too hot and humid and Daniel and I cleaned the tool room, so I didn't want to sand in there.
The finish was very easy to sand off. It took about 1.5 hours with 60 grit sandpaper and the orbital sander to get most off. By then the sun had set and I had to quit. The table is so heavy that Daniel moved it in and outside for me. I'm impressed he could manage it alone.

Early the next morning I spent another hour sanding with 120 sandpaper. After that I switched to sanding by hand with 220. Finally, an hour after that, I gave it a final sanding with 400 and cleaned the dust off.
Daniel moved it inside and I began staining using leftover Dark Walnut colored stain. The color is a little darker than we originally wanted... It looked much lighter on the underside section of the table that we tested. Oh well... in general, I'm really happy with it.
Every day for the past four days I've been giving it a very light sanding and applying a coat of Verathane. So, the top is done! Now we need to pick out a paint color for the legs and chairs. We'll probably go with a very dark blue or green, like they already are. We decided that stripping all the paint off the chairs and table would be WAY too much work, so I'm just going to sand off the teeth marks and rough up the paint enough to re-paint them.
My goal is to have this done by the time our new baby is born. Hopefully, I'll get on a roll and finish them this month. The weather needs to cooperate for that though.
.
I tried really hard not to get excited about this table and chairs when I saw them online. The guy was only asking $50 and the solid wood table is really pretty. After some e-mailing we arranged to pick up the set later that day. Turns out, a dog has chewed many of the chair legs and they are uncomfortable, at least when compared to our plush, cushy, rolling chairs, but when the guy lowered the price to $30, I couldn't say no. We figured they would need to be refinished anyway because of the color, and most of the chew marks are superficial.

Our current table is very functional and we've been extremely happy with it. It's some kind of laminated particle board - virtually indestructible. The only downside to this table is that it doesn't look very nice without a tablecloth on it. Still, we want to keep it for a craft/school table. Someday, if we have a dining room and eat in kitchen, two tables with be handy. In the meantime, two tables and eight chairs won't fit in our dining room, so Daniel took the legs off the new one and is storing it in the shed until I can start working on it.
One week later:
I started refinishing our kitchen table! I had been waiting for the perfect, cool evening to do it. Daytime weather is too hot and humid and Daniel and I cleaned the tool room, so I didn't want to sand in there.
The finish was very easy to sand off. It took about 1.5 hours with 60 grit sandpaper and the orbital sander to get most off. By then the sun had set and I had to quit. The table is so heavy that Daniel moved it in and outside for me. I'm impressed he could manage it alone.

Early the next morning I spent another hour sanding with 120 sandpaper. After that I switched to sanding by hand with 220. Finally, an hour after that, I gave it a final sanding with 400 and cleaned the dust off.
Daniel moved it inside and I began staining using leftover Dark Walnut colored stain. The color is a little darker than we originally wanted... It looked much lighter on the underside section of the table that we tested. Oh well... in general, I'm really happy with it.
 |
| Close up |
 |
| The table saw makes a great work surface |
 |
| Another view |
Every day for the past four days I've been giving it a very light sanding and applying a coat of Verathane. So, the top is done! Now we need to pick out a paint color for the legs and chairs. We'll probably go with a very dark blue or green, like they already are. We decided that stripping all the paint off the chairs and table would be WAY too much work, so I'm just going to sand off the teeth marks and rough up the paint enough to re-paint them.
My goal is to have this done by the time our new baby is born. Hopefully, I'll get on a roll and finish them this month. The weather needs to cooperate for that though.
.
Monday, August 6, 2012
Sneak Peak at Mari's Birthday Present
Mari loves accessories. She will keep sunglasses on for hours. She likes to wear tons of jewelry, play with hats, socks, and anything else that she can get to stay on her head or around her arms. So, Daniel and I want to give her some dress-up clothes for her birthday. Given her love for "capes" (blankets draped around her shoulders), I thought it would be fun to sew her a real cape. Even though she doesn't turn 2 until November, I wanted to sew it now, in case I don't feel up to it later. Yesterday, I went to the fabric store and picked out the pinkest fabric there. Originally, I was going make my own pattern, but McCall's patterns were on sale for $1.99, so I bought one of those too.

Since Daniel stayed home with Mari, I enjoyed taking my time choosing fabric and browsing the fall decorations. With 20 people in line at the cutting counter, it's a good thing I wasn't in a hurry! Deciding whether or not to make it a pink cape was tough because they had this sparkly, navy fabric that would have made a really great magicians cape. The green and purple fabric was really nice too. In the end, I just couldn't make up my mind, and I was afraid Daniel would think I was never coming home, so I went with my original idea and bought pink.
This project was definitely my speed. The pattern was super easy and it took about 2 hours to make. We are not going to use grommets and ties, because our grommet maker is rather large, and Mari wouldn't be able to put it on by herself. We'll figure something out with velcro, but I still need to buy that, so it's not officially done yet. Now that it is made, I with there was some kind of collar or hood at the neck. Maybe next time I'll modify that...
The length is long for Mari. It'll probably touch the floor. I haven't tried it on her yet because I don't want her to see it. Even if it trails along a bit, she'll grow into it.
Michael's had some dress up clothes on a major clearance sale over the weekend, and I picked up come pink slipper-style dress up shoes to go with this.
I'm so eager for her birthday in November!

Since Daniel stayed home with Mari, I enjoyed taking my time choosing fabric and browsing the fall decorations. With 20 people in line at the cutting counter, it's a good thing I wasn't in a hurry! Deciding whether or not to make it a pink cape was tough because they had this sparkly, navy fabric that would have made a really great magicians cape. The green and purple fabric was really nice too. In the end, I just couldn't make up my mind, and I was afraid Daniel would think I was never coming home, so I went with my original idea and bought pink.
 |
| This picture shows the sparkles! |
 |
| Almost done! |
The length is long for Mari. It'll probably touch the floor. I haven't tried it on her yet because I don't want her to see it. Even if it trails along a bit, she'll grow into it.
Michael's had some dress up clothes on a major clearance sale over the weekend, and I picked up come pink slipper-style dress up shoes to go with this.
I'm so eager for her birthday in November!
Friday, July 27, 2012
Wall Art
Our bedroom walls need a little art. So does the living room. I've been looking online (especially Etsy) for ideas and inspiration. I tried my hand at watercolor painting in an attempt to DIY our art, but in the end decided that I probably need a lot more practice before creating a wall-worthy piece. There is a WPA print of Denali National Park that Daniel and I both like. At $40, it's a little more than I wanted to spend. After continued searching, I discovered an over-sized calendar containing this and 11 other prints for less than $20! I've pre-ordered the 2013 calendar and can hardly wait for it to come. Each print is 13x 19 inches. Three of them should look OK over the fireplace. Despite being reproductions of vintage prints, I am hoping that the bright colors and retro look will give our living room a younger, fresher vibe. We would like each one to have some kind of personal significance, so we'll probably hang the Blue Ridge Parkway picture with Denali.

Monday, July 23, 2012
Boat Beds II
Daniel got home around lunch time today, giving us an early start to the weekend and more time to work on the bunk beds! He managed a lunch break yesterday to pick up the cherry from the lumberyard. He has been figuring out how to make the trim this afternoon. It seemed kind of complicated, so while he did that, I cut lots of plugs to fill the screw holes on the posts.I drilled way more than we needed, just so they will be readily available for future projects, and cause it was kinda fun.

That's really everything new. With running on Monday night, soccer on Wednesday, and Happy Hour on Thursday night this is the first opportunity we've had to spend some time in the tool room.
 |
| Here's a look at the posts. I sanded them today and will put another coat of varnish on tonight, once we are done sawing. |
 |
| I like using the drill press best out of all the tools. It is quiet and doesn't seem life-threatening in any way. |

 |
| Trim pieces |
Tuesday, July 17, 2012
Boat Bunk Beds
The summer is whizzing by. Our most recent project has been getting Mari's room ready for the new baby. We are completely changing it from pink and green to a nautical theme (they will be sharing, but I think this theme will work well for girls too, despite the reds and blues). This includes getting a new bed for Mari, since the baby will need the crib. Originally, we both loved the idea of bunk beds, but once I taped it out on the floor, we realized the room was too small for twin sized bunk beds. We would have to get rid of the dresser, the changing table or the rocker in order to fit a twin bed. I was OK with ousting the rocker, but Daniel was adamant that it stayed since he will probably be the one who uses it when the baby wakes up crying at night.
Our creative solution was to build toddler sized bunk beds. Since Mari has always been on the short side, we figure she will be able to sleep in this size bed until she is 5-6 years old. At that point, we will probably have moved to a bigger house and she could have her own room, twin sized bed included.
I couldn't find a picture of Mari's room, but here is a video that shows what it looked like, minus toys scattered everywhere.
So, we wanted the bottom bed to be shaped kinda like a boat, with a rounded front. The top bunk will just be square. It truly has been a joint collaboration. We both designed it, figuring out the dimensions and cutting all the wood together. Daniel mainly figured out how to make the front part rounded and sturdy, and I stained everything that will not be painted. Here are some of the in progress pics from last weekend.
Since then, we have been working on the posts, which are made from two 2x4's screwed together. This saved us about $20 from having to buy 4x4 posts, . I was a little skeptical about how this would look, but after much sawing, sanding and staining, they look great! Daniel sawed off the corners to make them look rounder and more mast-like.
Left to do includes: assembling the top bunk, cutting and attaching the trim, mounting the bunks to the posts
We are kinda stuck until the weekend, because we need to go to the lumberyard, which is only open when Daniel is at work, to get more cherry trim pieces and buy a new router bit.
All told, these beds will have cost about $100 in materials, since we already have the paint, stain, and varnish we'll be using, as well as sandpaper. Using pine reduced the cost a lot (although the trim will be cherry cause we already have a little of that). Not bad for solid wood bunk beds, even if they are toddler sized. That doesn't include the mattresses. I've been researching those on amazon, trying to find the best, thickest one with the highest weight limit and best reviews. It's almost as time consuming as building the beds!
I can't wait to post after pics! We hope to have the bed completely finished by this weekend. Maybe once that is done, I can really finish Mari's play kitchen.
Our creative solution was to build toddler sized bunk beds. Since Mari has always been on the short side, we figure she will be able to sleep in this size bed until she is 5-6 years old. At that point, we will probably have moved to a bigger house and she could have her own room, twin sized bed included.
I couldn't find a picture of Mari's room, but here is a video that shows what it looked like, minus toys scattered everywhere.
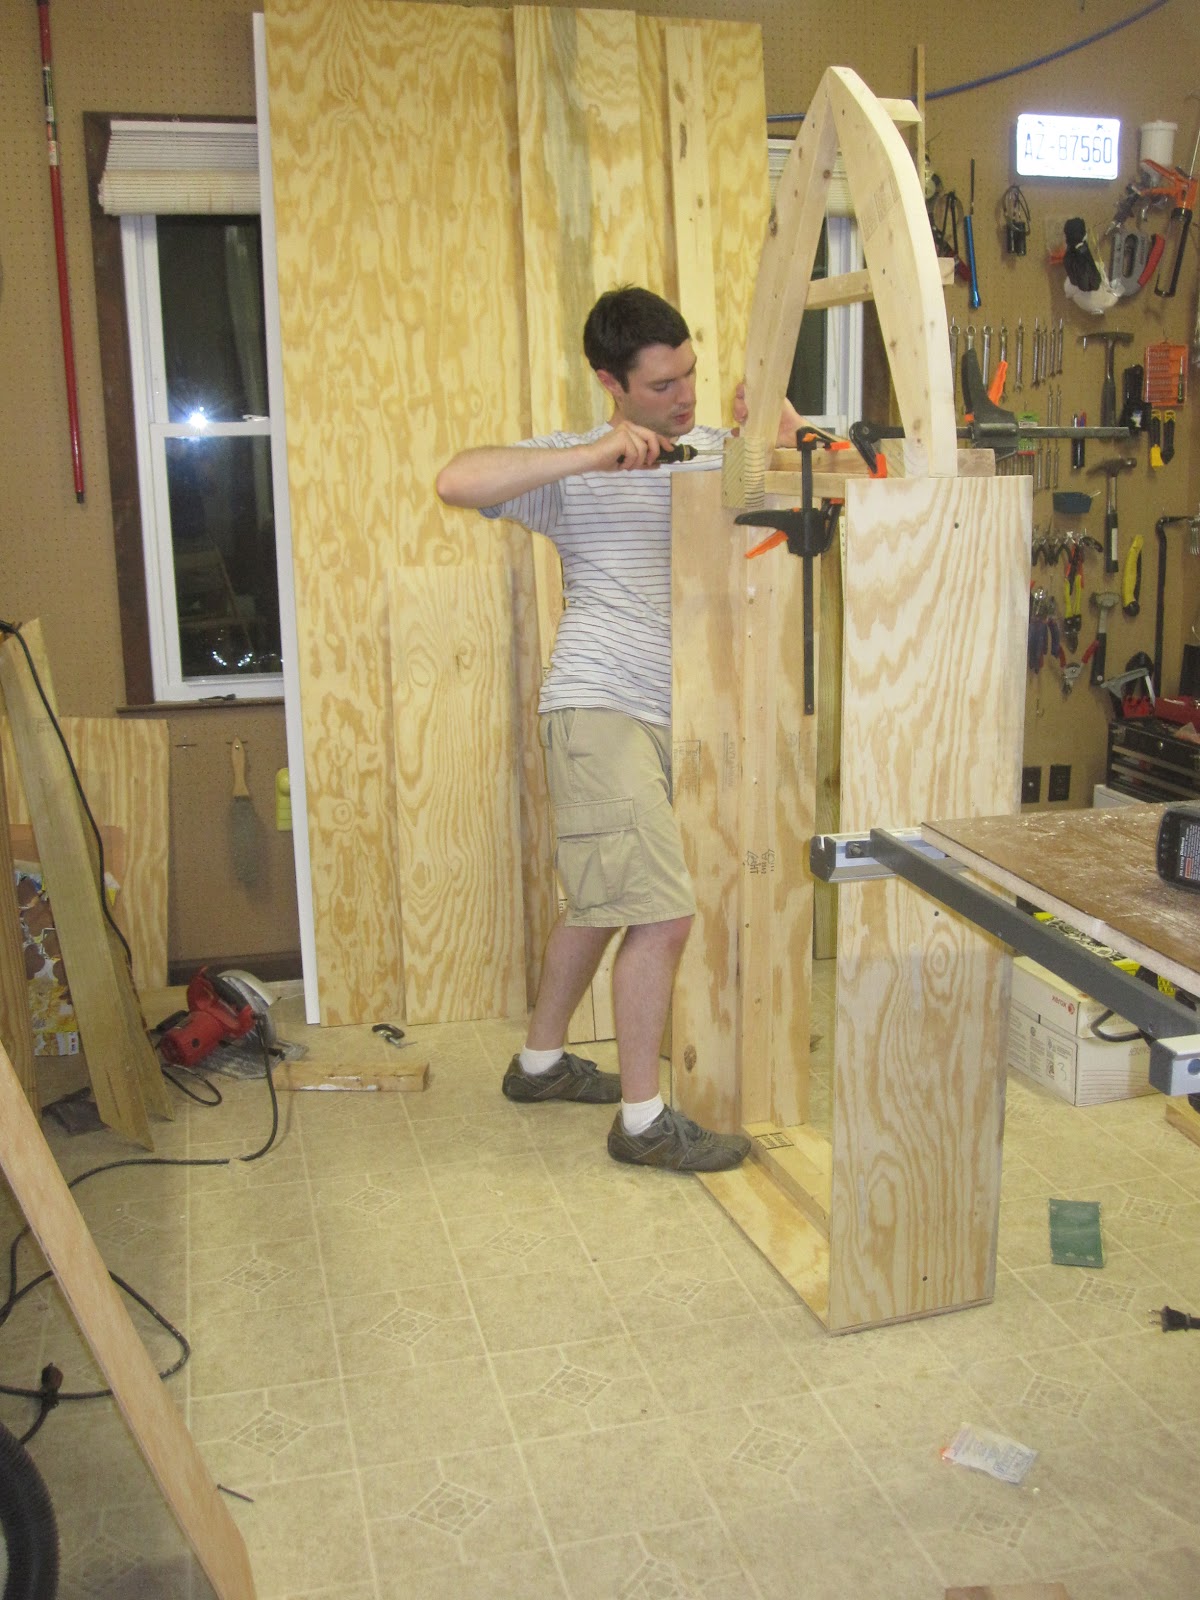 |
| Daniel working hard |
 |
| The bottom frame |
 |
| Success with the jigsaw |
 |
| Mari likes it already! |
 |
| It's starting to look more like a boat |
Left to do includes: assembling the top bunk, cutting and attaching the trim, mounting the bunks to the posts
We are kinda stuck until the weekend, because we need to go to the lumberyard, which is only open when Daniel is at work, to get more cherry trim pieces and buy a new router bit.
All told, these beds will have cost about $100 in materials, since we already have the paint, stain, and varnish we'll be using, as well as sandpaper. Using pine reduced the cost a lot (although the trim will be cherry cause we already have a little of that). Not bad for solid wood bunk beds, even if they are toddler sized. That doesn't include the mattresses. I've been researching those on amazon, trying to find the best, thickest one with the highest weight limit and best reviews. It's almost as time consuming as building the beds!
I can't wait to post after pics! We hope to have the bed completely finished by this weekend. Maybe once that is done, I can really finish Mari's play kitchen.
Subscribe to:
Posts (Atom)